父子元件的資料傳遞
簡介
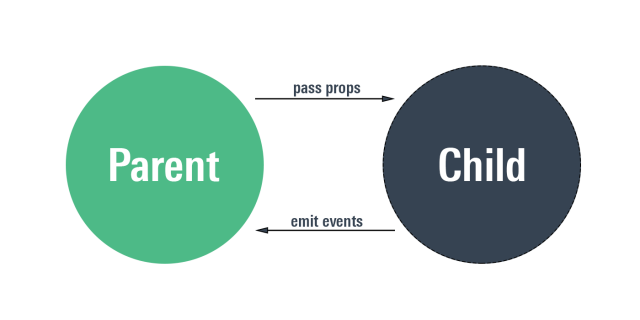
- 在 Vue 當中,常常會遇到要從外部元件傳遞資料到內部元件
- 例如一些客製化表單元件,如果我們想重複使用,必須封裝成 UI 元件,再從外部傳入資料
- 以下整理幾種常用寫法提供我自己參考
方法 1:使用 props 和 emit
一般寫法
- 在父元件中,傳遞
props到MyInput - 在子元件中,接收
props,顯示在畫面上 - 建立
emit,當 Input 內的值變動時,把更新的資料傳出到父元件
// 父元件
<script setup lang="ts">
import MyInput from '@/components/MyInput.vue'

const msg = ref('')
const updateMsg = (newMsg: string) =. {
    msg.value = newMsg
}
</script>
<template>
  <MyInput :input-value="msg" @update-value="updateMsg" />
</template>
// MyInput.vue
<script setup lang="ts">
import { defineProps, defineEmits } from 'vue'

defineProps<{
  inputValue: String
}>()

const emit = defineEmits(['update-value'])

const onInput = (event: Event) => {
  const value = (event.target as HTMLInputElement).value
  emit('update-value', value)
}
</script>

<template>
  <input type="text" :value="inputValue" @input="onInput" />
</template>
Vue3 寫法
- 使用
modelValue,update:modelValue
// 父元件
<script setup lang="ts">
import MyInput from '@/components/MyInput.vue'

const msg = ref('')
</script>

<template>
  <MyInput :modelValue="msg" @update:modelValue="msg = $event" />
</template>
- 自訂
props的名稱,替代modelValue
<MyInput :modelValue:customMsg="msg" @update:modelValue="msg = $event" />
// MyInput.vue
<script setup lang="ts">
import { defineProps, defineEmits } from 'vue'

defineProps<{
  modelValue: String
}>()

const emit = defineEmits(['update:modelValue'])
</script>
<template>
  <input
    type="text"
    :value="modelValue"
    @input="emit('update:modelValue', ($event.target as HTMLInputElement).value)"
  />
</template>
使用 v-model
- 可以在父元件,直接使用 v-model 簡化程式碼
MyInput則維持不變
// 父元件
<script setup lang="ts">
import MyInput from '@/components/MyInput.vue'

const msg = ref('')
</script>

<template>
  <MyInput v-model="msg" />
</template>
// MyInput.vue
<script setup lang="ts">
import { defineProps, defineEmits } from 'vue'

defineProps<{
  modelValue: String
}>()

const emit = defineEmits(['update:modelValue'])
</script>
<template>
  <input
    type="text"
    :value="modelValue"
    @input="emit('update:modelValue', ($event.target as HTMLInputElement).value)"
  />
</template>
方法 2: Writable computed
- 在
MyInput內新增 computed 變數myMsg - 設定這個變數的
getter和setter - 和 Input 標籤使用 v-model 雙向綁定
- 當 Input 內的值變化時,
myMsg的值跟著改變,觸發setter - 當
setter觸發時,執行emit,將更新的值傳出到父元件
// 父元件
<script setup lang="ts">
import MyInput from '@/components/MyInput.vue'

const msg = ref('')
</script>

<template>
  <MyInput v-model="msg" />
</template>
// MyInput.vue
<script setup lang="ts">
import { defineProps, defineEmits, computed } from 'vue'

const props = defineProps<{
  modelValue: String
}>()

const emit = defineEmits(['update:modelValue'])

const myMsg = computed({
  get() {
    return props.modelValue
  },
  set(newVal) {
    emit('update:modelValue', newVal)
  }
})
</script>
<template>
  <input type="text" v-model="myMsg" />
</template>
方法 3:使用 VueUse 的 useVModel
- 直接引入
useVModel - 不用自己寫
computed的getter和setter
// MyInput.vue
<script lang="ts" setup>
import { useVModel } from '@vueuse/core'

const props = defineProps<{
  modelValue: string
}>()
const emit = defineEmits(['update:modelValue'])

const myMsg = useVModel(props, 'modelValue', emit)
</script>
<template>
  <input type="text" v-model="myMsg" />
</template>
方法 4:使用 defineModel
- 在 Vue 3.4 中,新加入的 API(Stable)
- 簡化了以上這些寫法
範例:傳入一個字串
// 父元件
<script setup lang="ts">
import MyInput from '@/components/MyInput.vue'

const msg = ref('Hello world')
</script>

<template>
  <MyInput v-model="msg" />
</template>
// MyInput.vue
<script setup lang="ts">
const model = defineModel()
</script>

<template>
  <input v-model="model" />
</template>
範例:傳入一個物件
// 父元件
<script setup lang="ts">
import MyInput from '@/components/MyInput.vue'

const searchData = ref({
  keyword: 'Hello',
  page: 1
})
</script>

<template>
  <MyInput v-model="searchData" />
</template>
// MyInput.vue
<script setup lang="ts">
interface SearchData {
  keyword: string
  page: number
}
const model = defineModel<SearchData>()
</script>

<template>
  <input v-model="model.keyword" />
  {{ model.page }}
</template>
參考資料
# Vue # V-model # Computed